
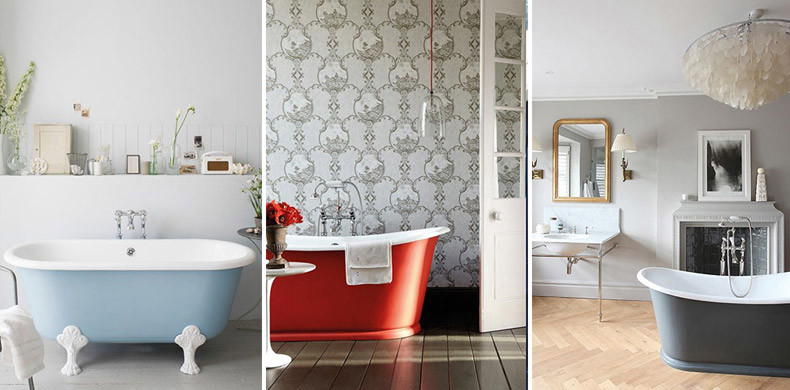
Whether you want to brighten up an older bath or change the atmosphere in your bathroom completely, painting your bath is a fantastic way to freshen up and add a unique touch to your bathroom. Not only will adding a lick of bath paint yourself give your bathroom some extra oomph without you having to strip out any fittings or fixtures, it also makes a fun DIY project and provides an opportunity to really get creative.
We’re also not going to pretend that it’s the most exciting job in the world, but being able to relax in a freshly painted tub in a colour of your choice makes the whole ordeal totally worth it.
Here’s our fool-proof guide to painting your bath perfectly:
Baths You Can Paint
Contrary to belief, painting a bath isn’t quite a simple as chucking a bucket of bath paint over your tub and leaving it to dry. There’s actually a lot to consider, the first thing being whether your bath is actually suitable for painting.
There are two types of bath which can be painted; cast iron and acrylic. Painting a cast iron bath is a little more complicated so it's advised that you, to make life a little easier, this guide will focus mainly on how to paint an acrylic bath which, if you’ve bought a bath recently, is likely what it’s made from anyway.
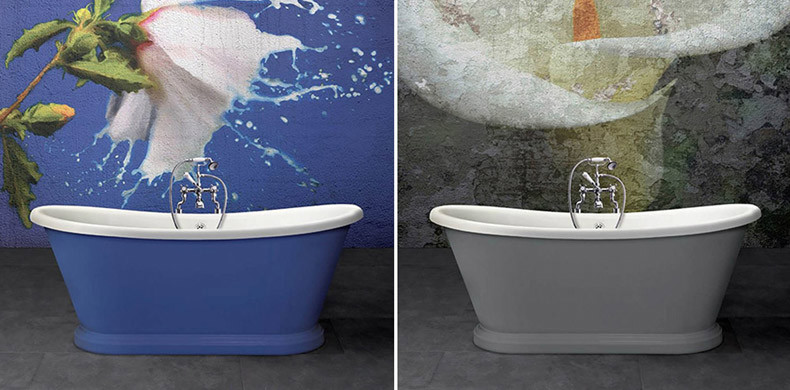
Buying An Already Painted Bath
If your DIY adventures ended the day you struggled to connect your TV to the DVD player, getting stuck into a job as mammoth as bath painting may not seem all that enticing. Some people simply aren’t built for DIY and would rather spend the money on something that doesn’t require getting knee-deep in paint and giving yourself cramp from sanding too vigorously.
While buying an already painted bath may not save you any pennies, it’ll certainly allow you to give your bathroom that personal touch without the hard work. Available in a huge range of colours and sizes, this BC Designs Freestanding Boat Bath needs absolutely nothing done to it, meaning you can still add a splash of colour to your bathroom while keeping your stress-levels in check. Plus, who’s really going to know you didn’t paint it yourself? We won’t tell.
Bath Painting Service
If you don’t want to do any DIY, but can’t find a bath in the colour you’re after, BC Designs have just started offering a bath painting service on a few of their tubs. They have over 170 beautiful colours of bath paint to choose from and will have access to materials you may not be able to buy yourself. Plus, it’ll take far less time to finish the job and the finish will likely last longer.
DIY At Home
So, you’ve decided to go it alone? Good for you. DIY is rewarding, occasionally fun and will give you a huge sense of achievement, especially if you don’t see yourself as much of a do-it-yourself kind of person. Megan Barrington, Interior Design expert here at Drench, advises "painting your bath is a great idea to give your bathroom a refresh and add more character to your space . Baths are a focal point of a bathroom, so creating it into a statement piece will add more value to your bathroom and is a fun activity to try out."
What Paint To Use?
It’s always best to check with your bath manufacturer what kind of bathtub paint is best to use. The type of paint you use will have a huge impact on the quality of the finished product. Using a low quality, latex paint will result in short-lived satisfaction, as the colour is unlikely to last for long. Bog-standard paint will struggle to withstand water in the same way specific bathtub paint will.
Various manufacturers will supply paint intended for baths and tiles. One or two-part epoxy paints are a good place to start when it comes to painting an acrylic bath.
For a cast iron tub, the bath paint needed must be suitable for both metal and wood. An oil-based bath paint is the best choice, as well as an oil-based primer. Ensure the bath is clean and free of rust before you begin.

Safety First
Wear a respiratory mask, gloves and if you have a fan, switch it on. Bath paint is not pleasant when inhaled, and it’s always important to be careful around chemicals. If you have any doubts, contact your bath manufacturer and they should be able to help you.
Brush, Roller Or Spray Gun?
Spray guns generally give the best-looking finish however, they can be pricey, so if your predominant reason for painting your bath is to save money then a spray gun may not be suitable. They can also be messy. If you are using a spray gun it’s essential to tape or cover everything that you don’t want to get covered in paint. And we seriously mean everything.
Brushes and rollers on the other hand don’t give quite as an expensive looking finish, but are cheaper and you’re less likely to end up with your entire bathroom covered in paint.
You Will Need:
- Acrylic Polymer Paint
- Primer
- Brush, roller or spray gun
- Rough sandpaper
- Super-fine sandpaper
- Facemask
- Gloves
- Masking tape
- Newspapers or old sheets to protect the floor
Step 1:
Get organised. Cover any areas of your bath that you don’t want to get paint on with masking tape, for example the feet or roll-top edge. Also cover any parts that require more careful work as these can be done at the end.
Lay down sheets or newspapers to protect the floor. Put on your goggles and gloves. Take a deep breath. Tell yourself you can do this. Perhaps play some motivational music.
Step 2:
Thoroughly clean your bathtub from top to bottom and then leave it to dry. Starting with a clean bath will massively reduce the amount of sanding that is needed.
Step 3:
Get sanding. We’re not going to pretend this job is fun, but it sure is necessary. Using the rough sandpaper, sand the outside of the tub until it feels rough to touch. This rough surface is your primary source of adhesion, and doing this job properly will result in a far more durable and less DIY-looking finish.
Step 4:
Rinse away excess dirt or sand with warm water then leave your bath to dry. Go and make a cup of tea.
Step 5:
Double check no residue or leftover water remains on your bath. Then, apply a thin layer of primer to your bathtub with your brush or roller. It’s important to ensure the primer sits on your bath completely evenly, otherwise it may still be visible after painting. To achieve this, it’s best to do 2-3 thin layers, lightly sanding your bathtub in between each coat of primer.
Step 6:
Once the primer has dried it’s time start painting! Using your colour of choice carefully paint or spray your bath. Like with the primer, it’s best to do a few thinner layers to ensure the finish is smooth and even.
Step 7:
When the first layer of bath paint is dry, gently sand your tub using your finer sandpaper. Ensure the first layer is smooth and doesn’t have any brush marks or streaks. Apply three layers of paint, leaving each one to dry and continuing to lightly sand after every coat apart from the last.
Step 8:
Step back, admire your handwork, compliment yourself on your DIY skills and leave to dry for 48 hours. Once the paint has dried, we recommend sealing it with an aerosol sealer but it’s best to check with your manufacturer on which sealants can be used on your acrylic bathtub. Refrain from taking a long hot bath for a few days just to make double sure that the paint has dried properly.
So, there you have it, a complete guide to painting your own bathtub! The things to bear in mind before you get started are safety, ensuring your bathroom is covered and checking with your manufacturer which bath paint to use. Follow this guide and we’re confident you will find your bath painting experience stress-free, rewarding and perhaps even a little fun!


