
Fitting a shower tray may seem a somewhat daunting task and to some extent it is, so should be conducted by a trained professional if you are not confident. However, if you feel you can fit a shower tray yourself, stay tuned as we take you through this rewarding process in our comprehensive step-by-step guide.
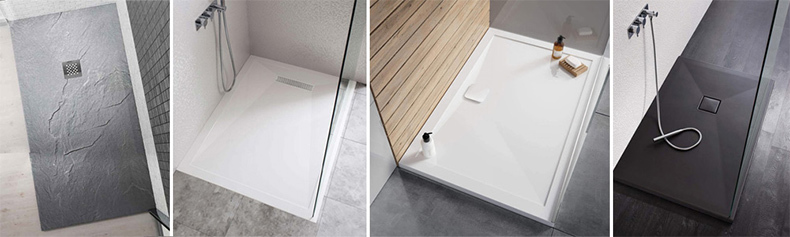
Types of Shower Tray
Riser Kit Shower Trays
A shower tray with a shower riser kit sits on legs positioned to the correct height to suit your shower enclosure. They are a popular shower tray option as they enable you to easily reach the pipes below the shower enclosure.
Low Profile Shower Tray
A low profile shower tray is one that sits flush with the bathroom floor or as close to level as possible. What these give up in accessibility, they make up for in seamless style, and this type of shower tray used in most modern shower enclosures and wetroom setups.
Preparing for Shower Tray Installation
You will need:
- Pencil
- Spirit level
- Dust sheet
- Drill
- Large jug/kettle
- Hacksaw/jigsaw
- Silicone sealant
- Sealant gun
Before you purchase, check and double-checked the dimensions of your shower tray and the space it is intended to go. You should also use a spirit level to check whether the intended area is level.
Do not tile the walls or install the wall panels right up to where you will be installing the shower tray. Once shower tray installation is complete, then tile to that point. The result is a far more effective waterproof seal around the shower tray edges.
You will likely be installing your shower tray onto your bathroom’s base wooden flooring, enabling you to draw shower tray outlines in pencil and carefully check all measurements. Ensure there is easy access to the water waste pipe below the shower tray – to some extent, the position of this pipe dictates the position of your shower. If you wish to drastically relocate the position of your shower within your bathroom, you will need to alter the layup of the waste itself to ensure it will fit comfortably to your new shower tray’s waste trap.
How To Fit A Shower Tray
- Mark out the tray position
- Choose the waste position
- Line up side panels
- Check the tray is level
- Attach the waste
- Apply sealant
- Complete the surrounding walls
- Install the side panels
1. Mark Out The Tray Position
Place your new shower tray in the general position you intend to fit it. Use a pencil to outline the shower tray and consider any placement issues. Fit the adjustable legs that came with your shower tray and adjust them to a height that is both even and intended. Use a spirit level to ensure that it is indeed flat. Make sure there are no issues with clearance or alignment.
Do not rush this, and do not forget the shower tray’s central leg if you want to avoid the shower tray sagging once in use!
2. Choose The Waste Position
Loosely attach the shower tray waste and ensure that below the shower tray will be able to connect securely to your bathroom’s water waste. Figure out the best route for this connection to occur and loosely fit everything so you are confident that the placement will work.
Sometimes the adjustable legs may need to stand higher than anticipated to enable the angles of the connection between shower tray waste and your bathroom’s water waste.
Bear in mind the general rule of 50mm of adjustable shower tray leg per metre of pipe.
3. Line Up Side Panels
Take the side panels that came with your shower tray and line these up to check how they will look when finished.
Keep an eye on the instructions supplied with your adjustable height shower tray as this will detail the minimum and maximum shower tray heights for the adjustable legs, as well for the shower tray side panels.
Depending on the height you have set for your shower tray, the side panels may need to be trimmed for a flush finish. Follow the manufacturer’s instructions for this process, usually conducted by hacksaw or jigsaw.
4. Check The Tray Is Level
Double-check that each of your shower tray’s adjustable legs are fully tightened and flush with all seals properly tightened. Check your instructions for fitting the shower tray legs to the floor – this may be by specially made adhesive pads or by screws fitted by drill.
Break out the spirit level once again and check that the shower tray itself is 100% level with your bathroom floor. If the shower tray is uneven, you will encounter all manner of drainage issues. Do not think that a slight unevenness in the direction of the shower tray waste may benefit drainage – shower trays are designed when flat to best channel water toward the waste.
5. Attach The Waste
Attach the underside of your shower tray waste trap to your water waste. Fill a large jug or kettle with cold water and pour it through your shower tray waste.
If there is any leakage then remove and reset all connections. It's important to test whether everything is water-tight before applying any sealant.
6. Apply Sealant
With your shower tray waste connected safely to your bathroom water waste and shower tray side panels trimmed to suit your setup, it’s time to seal everything.
Take your silicone sealant and carefully seal around the edges of the shower tray. Do this first around the edges of the tray where it meets the bathroom walls. This is your initial seal. Ensure you apply all sealant lines evenly and leave to set for the instructed time, which can be up to 24 hours.
7. Complete The Surrounding Walls
With your shower tray sealed and in place, you are able to complete the walls around the shower tray. When tiling or applying wall panels, leave an approx. 3mm gap between the tiles and your shower tray.
Now run sealant through this gap ensuring it enters the full depth of the gap. This is your secondary seal, the most important for ensuring a watertight shower experience.
8. Install Side Panels
It's time to secure your shower tray side panels. These will usually snap into place around the shower tray adjustable legs using supplied clips.
You can also apply lengths of timber flush behind the line that the shower panels will run for an additional fixing point or simply to support the panels.
Installing a Low Profile Shower Tray
Low profile shower tray installation is a little trickier as there is far less room for manoeuvre when linking the shower tray waste trap to your bathroom’s water waste pipe. This is a more intensive process than the adjustable height shower tray installation we just covered, so don't be afraid to seek professional help.
You Will Need
- Pencil
- Spirit Level
- Jigsaw
- Dust sheet
- Bucket
- Building sand
- Cement
- Mortar trowel
- Large jug/kettle
- Silicone sealant
- Sealant gun
Step 1
First, you must ensure the floor beneath your low profile shower tray is 100% flat, solid and secure enough to hold the weight of shower tray and user.
With many low profile shower trays cast of stone resin, they are incredibly heavy and can indent or even catastrophically damage weaker bathroom floors. See if the floor where you intend to fit your shower tray can be stood upon with zero flex. If not, you will need to replace these floorboards with far thicker, more secure boards.
We recommend using 20mm+ thick marine plywood and creating a solid plinth for long-lasting secure shower tray use. Of course, use your spirit level to ensure the plinth itself is 100% level.
Step 2
With your intended fitting area secure, it is time to cut an access hatch into the floorboards next to your fitting area. Trace your lines using a pencil and use a jigsaw for accurate completion. This access hatch is vital so that you can easily access pipework once the low profile shower tray has been set.
It is essential for simple maintenance that would otherwise require your lovely new shower tray to be ripped up.
For all work, it is highly recommended to use a dust sheet across the shower tray body so that you do not damage the tray surface in any way!
Step 3
You next need to assess the location of your low profile shower tray waste and that of your bathroom waste pipe. You will need to cut a recess around these.
Use a pencil to clearly mark these areas and double-check your workings before using a jigsaw to accurately complete this process. Ensure a small amount of space to frame the shower tray waste – the intention is a comfortable fit rather than an overly tight fit that makes maintenance trickier.
With this complete, you can assemble the waste and lay it in place. Step back, marvel at your work and prepare to get your hands dirty.
Step 4
Let’s get mixing… Take your bucket and mix building sand with cement to create mortar. The general ratio for this is 5 parts building sand to 1 part cement.
With your mix complete, take your trowel and lay a thin, even layer of mortar across the shower tray spot. Use steady strokes as if cleaning a window and ensure there are no bumps that might cause unevenness.
Step 5
With your trusty spirit level ready and by your side, apply your low profile shower tray gently upon the mortared area and press very gently. Use your spirit level at all times to ensure that the shower tray is engaging 100% level with your bathroom floor.
Do not be afraid to lift the shower tray and reset. Once satisfied with the fit, leave the mortar to dry for at least 24 hours. Go and take a well-earned rest and shower – in a different bathroom, obviously!
Step 6
Use your access hatch cut beside the shower tray to connect the shower tray waste and your bathroom’s water waste pipe. Is it secure? Fill a large jug or kettle with cold water and pour it through your shower tray waste.
If there is any leakage then remove and reset all connections – the last thing you want is to discover a leak once everything is sealed up.
Step 7
Double-check that your pipework is connected securely and you are almost there – now it is time to seal everything.
Carefully seal around the edges of the shower tray itself. As your shower tray is a low profile design, leave a 3mm gap between the edges of your tiling and the edges of your shower tray. Do the same with your wall tiles.
Once you have made your initial seals, leave for 24 hours. Then run a secondary line of sealant in the 3mm gap between wall and floor tile. Ensure that the sealant penetrates this gap fully. This is your secondary seal and very important to ensure no leakages occur.
Here to Help
If you do encounter any immediate issues, you will need to reach out to a plumber right away to halt any leakages and stop any water damage to your home. The Drench team features many a home bathroom DIY expert so if your issue is not major, please do not hesitate to reach out to us right here. We jump at any chance to share our shower tray installation expertise – as well as knowledge on anything else in the world of home bathrooms.


