
The Project in Hand
When Rosie and her partner Will bought a 19th century 36 bedroom cottage, it was clear to see they had a huge project on their hands! The gorgeous property is located in the Yorkshire Dales and consists of a farmhouse, mistal, cottage and four acres of land to maintain. Rosie gave a great introduction to the project,
“The cottage is destined to be a holiday let so people can come and stay with us at the farm. When we started designing the space, we wanted the result to feel warm and inviting, somewhere to relax and unwind after a day's hiking in the Dales. It had to be luxurious, but still functional as it’s the only bathroom in the house (with the exception of a small cloakroom WC downstairs).”
We worked with Rosie to kit out the bathroom in the cottage, transforming it from an impractical, dated space to a luxurious dream, brought to life with a bright red classic roll top bath, clever storage, traditional chrome accessories and a nifty upcycled vanity unit. Since this was the only bathroom in the cottage, they wanted a luxurious yet playful design.
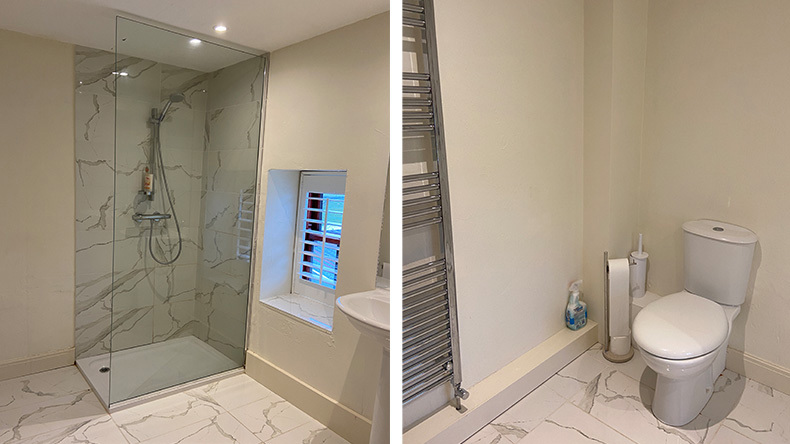
"When we began work on our 19th century cottage, we knew that the bathroom was going to need some serious thought. It was a comparatively large space for a small, two bedroom cottage, measuring around 2.5m x 2.5m, but the space really wasn’t utilised at all. The room is nigh on square, and had a shower, WC, sink and towel rail pressed into each corner, leaving the room feeling cavernous and disconnected. All the fixtures were spaced so far apart from each other and in combination with the white faux-marble tiles that covered the floor and shower enclosure, the room had a clinical edge."
What Was the Design Inspiration?
Rosie’s background is in interiors and textile design, so she has a keen eye for detail and creating beautiful spaces,
“I spend a lot of time immersed in really beautiful interior spaces for work and quite quickly get a vision of what I would like to do with a space when I spend time in it. For the bathroom, my ideas were pretty clear from the off. I’m also hugely influenced by period-appropriate design, and love to include references to historic design in the spaces I work on.”
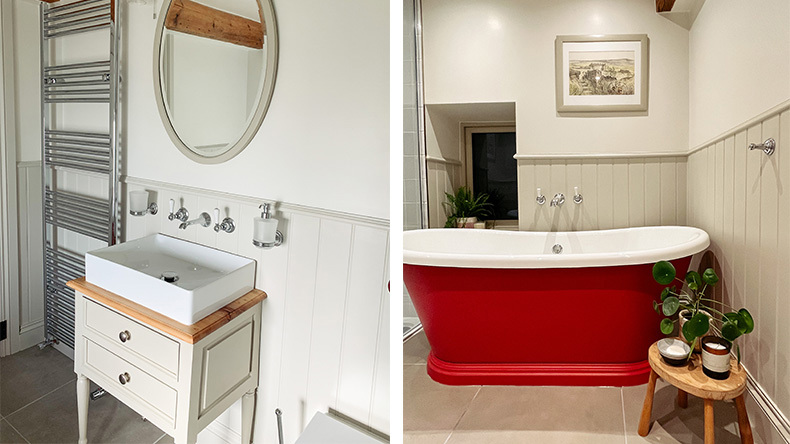
The beautiful bathroom finds a neat balance between traditional charm and modern touches with the pairing of traditional chrome accessories and a bright red bath,
“I wanted a space that balanced traditional bathroom design to align with the age of the house and embrace its history, with a fun, contemporary edge!”
Why a Statement Coloured Bath?
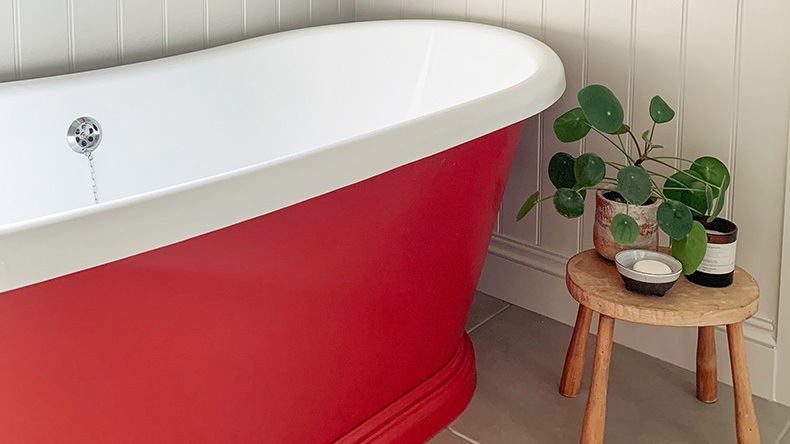
We absolutely love Rosie’s statement red bath - it adds an eye-catching element to the traditional bathroom and really pops in the space. We asked Rosie why she opted for this bold idea,
“I knew I wanted to inject personality into the space and as the cottage is destined to be a holiday let, I felt I could be much freer with the design choices than I might be in my own home. I’ve always had a thing for a really good orange-red. As soon as the possibility of fitting a bath became feasible, I could envision a beautiful red bath in an otherwise calm room."
Rosie chose the BC Designs double-skinned acrylic boat bath in the colour Drummond by Little Greene. This fabulous bath can be painted in over 300 colours - simply get in touch with our sales team if you'd like to know more.
“It’s such a happy, intense colour, evocative of Italian summers and it pairs beautifully with just about anything - a strong navy, contrasting pink, or in our case, the grounding neutrals of Portland Stone, also by Little Greene.”
Why Was the Crosswater Belgravia Range Chosen?
“We looked at a few different styles before we settled on the Crosswater Belgravia collection. We previously considered taking a more contemporary approach and mixing brands but eventually fell in love with the elegant shape of the collection and the nod to Victorian design it brought to our bathroom. It’s an incredibly beautiful range and it feels absolutely lovely to use too!”
Shop the collection and take a look at our product highlights here:
What Were the Main DIY Tasks?
We asked Rosie how they began with the bathroom renovation and what processes were involved,
“We managed to save a serious chunk of our finances by undertaking all of the labour on the bathroom project ourselves. I took care of the demolition, design, and sourcing , my husband Will did the plumbing and tiling, we split the plastering between us and we had family help with decorating. We’ve picked up a lot of DIY skills during our time at the farm, as we’ve been renovating non-stop but we both love getting our hands dirty!”
Many people shy away from getting stuck into DIY at home, but it’s a great way to massively cut labour costs when undergoing any type of renovation. Rosie admitted that YouTube was a great source of advice too,
“Plastering is a relatively new skill for us, as we’ve learnt over the past 18 months, firstly by watching a few videos on YouTube, and then just by giving it a go. By the time we did the bathroom, we’d had a few rooms to practise on, and whilst we’re much slower than the pros, our finish is pretty good. We both really enjoy the plastering process, so we tend to split a room between us, and it costs us a few bags of plaster rather than paying for labour.”
Here are the main DIY tasks Rosie and Will completed on the bathroom:
- Design - curating moodboards and deciding on a colour scheme
- Product and materials sourcing
- Demolition of the old bathroom, including old cement render from the stone walls
- Repairing the stonework after demolition
- Repointing where required to minimise draughts
- Framing the room out for insulating
- Plaster boarding
- Product fitting + plumbing
- Tiling and groove panelling
Rosie's Tips on Keeping Costs Down
Give DIY a Go!
“You’ll be amazed at how much you are really capable of and the knock on effect on your finances and the costing of a project can be huge. Equally, not everybody has the luxury of the time to DIY, it can be a real juggle to fit it in alongside everyday life."
Find Second Hand Deals and Explore Upcycling
“Scour reselling websites for things like tiles, especially if you have a smaller area to cover. We bought both the wall and floor tiles we used in the bathroom from Facebook Marketplace for a fraction of the retail price. You do have to be patient there though and wait for the right thing to pop up!”
For a more helpful tips, take a look at Rosie's Instagram where you can find an array of useful videos on a range of topics including upcycling, how to restore wooden beams and replacing windows. Here's a sneak preview into how they upcycled an old cabinet into a chic vanity unit:
Were There Any Issues With the Project?
Not everything ran smoothly during this project and Rosie admitted at one stage, it wasn't initially looking like the bath would fit into the space,
"We knew that to make a bath work, we would need to be clever with the space so decided to strip the bathroom right back to the stone and start again. This was the best decision we could have made as it allowed us to remove the concrete render from the stone walls and install stud walls with insulation between. The new stud walls also meant we could run pipework pretty much anywhere, so the bath suddenly became a possibility!”
Why Did She Choose Drench?
“I wanted to partner with Drench as I really loved their approach to bathroom design: there is so much choice available and I struggled to find another supplier with such an extensive range of products at competitive prices and with such a variety of design styles.”
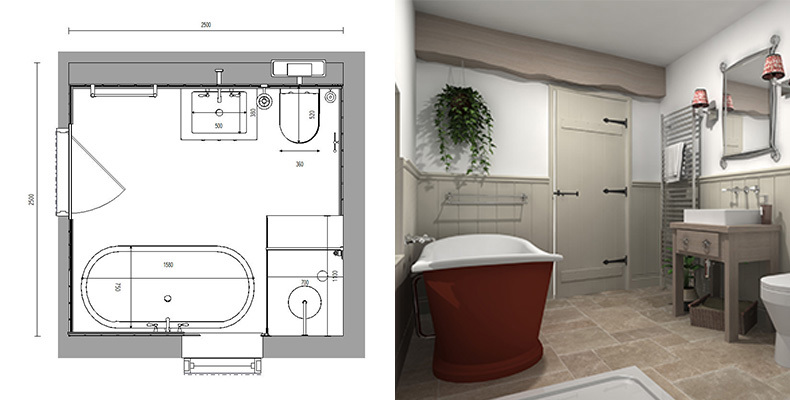
Rosie's Experience With the 3D Design Process
Here at Drench, we take pride in our bespoke 3D design service and our talented designers do an excellent job of crafting bathrooms that fully fit the client's brief. We asked Rosie how her experience with our 3D designers was,
“We absolutely loved using the 3D Design Service from Drench. The team did a fantastic job of interpreting my ideas and bringing them to life in CAD form. It also helped us to make some decisions about how we would use different finishes to zone the spaces, such as tiling only the shower enclosure, and how the fixtures would be spaced within the room."
"It was really helpful as a visual tool I could then use to explain my ideas to other people who were involved with the project.”


