Radiators are one of those fantastic additions to your home, not only from a design aspect but also as a bit of added comfort all year round. Having a warm home, especially during winter months, is vital for our well-being.
This being said, a lot of us will have radiators in the home that aren’t working as efficiently as they can be. This can lead to it taking much longer to heat rooms in the home and even higher heating bills over all.
If your radiators are cold at the top and warm at the bottom, this can be a sign that you need to ‘bleed’ them. This is a process of releasing the trapped air within the radiator so it can function effectively. It’s a job that should typically be done around once or twice a year. If your radiator needs bleeding more than twice a year, you might have a fault within your heating system and this should be looked at by a professional as soon as possible.
To ensure you bleed your radiator correctly and efficiently, we have compiled this handy guide to doing so:
So to start, you will need the following:
• Radiator bleeding key
• Disposable cloth
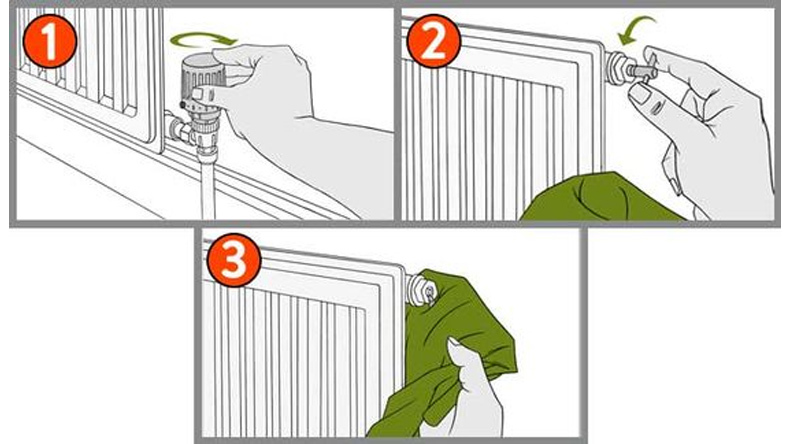
Step 1: Open your radiator valves
Fully open any thermostatic radiator valves on all of your radiators, including the ones on any heated towel rails in your bathroom and other rooms in the house. Once you have done this, run the central heading for around 10-15 minutes and then shut the system off completely.
Check the heat of each one of your radiators individually. If the radiators are cooler in one side or floor of your house compared to another, there is a chance that they are not properly balanced. This is a job for an experienced plumber so you will need to get in contact with one as soon as possible.
Step 2: Release any air in the radiator
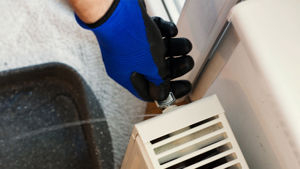
The next step is to take your radiator bleeding key (If you don’t have one, you can get one from your local DIY store of plumbers merchant) and insert it into the first radiator and turn slowly in an anticlockwise direction. Ensure that you have a cloth ready to catch any drips that come out of the radiator when doing so. If there is any trapped air within the radiator, it will emit from the valve, creating a hissing sound as it comes out. As soon as water starts to flow from the radiator, close the valve and wipe away any excess water.
Step 3: Check the rest of your radiators
Repeat the previous step for all of the radiators in your home and take care not the open the valves for longer than is absolutely necessary. Quite often, the majority of radiators in your home will be absolutely fine and will not need any bleeding. Once finished, turn the heating back on in your home and check the radiators for any dripping or leaking valves. If this is the case, simply close them with the radiator bleeding key.
Tips for bleeding a radiator and radiator maintenance
• If you’re going away for long periods of time, especially in the winter months, ensure that you drain the central heating system before doing so. If this isn’t an option, ensure that you have the heating automated so it comes on at a low temperature every day for the time that you are away. Not only will this prevent any build-up of damp, it will also ensure that the pipes do not freeze
• Cold sections at the bottom of a radiator are signs of sludge or rust build-up. When this happens, there is a chance that the reaction can create gases in the radiator that cause larger cold spots. If this is the case, ensure that the radiator is flushed out by a heating engineer or plumbing professional
Please note that this guide is a rough step by step guide. Bleeding some radiators will require a slightly different method so if you don’t feel confident with the process, make sure that you hire a DIY or plumbing professional to carry out the work for you.